Getting started
While CCEmuX tries to be as approachable and intuitive as possible, there are times where things aren't as clear as they should be. This guide tries to walk you through setting up CCEmuX, as well as some useful things you can try.
# Downloading CCEmuX
Running CCEmuX couldn't be easier! Simply grab the launcher and run it. On your first time running, we'll prompt you whether you want to use normal ComputerCraft or CC: Tweaked.
The launcher will automatically download the latest version whenever the emulator is updated. You should get a notification when this occurs: the next time you run the emulator you'll be up-to-date again!
When you start CCEmuX, a single computer will be opened by default. From here you can do anything you might do within the game - edit files, paint a picture, play worm. This is fantastic, and often enough, but CCEmuX can do an awful lot more:
# The emu command
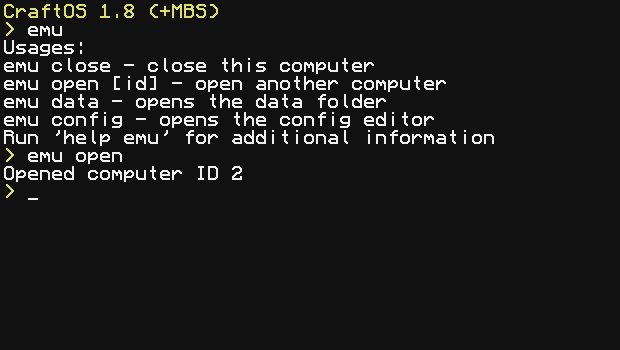
CCEmuX offers the ability to control the emulator by the ccemux API and emu
command. We'll focus on the second of those, as it's a little more user friendly.

Don't feel like you have to remember any of this! The emulator is documented in game, so you can always
run help emu if you get stuck.
# Opening more computers
Sometimes you may want more than one computer. Maybe you need to test a chat program, or just want separate
workspaces. Running emu open will open another emulator window with a fresh computer. You can also
pass in an ID of the computer you want to use.
Once you've finished running emu close will close the current emulator window. Of course, you could
always just press the "X" button.
If you ever need to access a computer's filesystem, run emu data. This will open CCEmuX's data
directory in your file manager, from which you can access each computer, as well as CCEmuX's configuration
files.
# Configuring the emulator
CCEmuX exposes many of ComputerCraft's built-in configuration options, as well as providing many of its own. While these can be changed by hand, it's often easier to use the built-in editor.
Just enter emu config to open the config UI. This has a list of every config option provided by
CCEmuX, as well as additional groups on the left. Settings are updated straight away, though some may not have
any impact until restarting the emulator.

If you're a little confused about what something means, just mouse over it. Most config options provide a tooltip which provides a more in-depth description of what it does.